
I’ve had a few comments recently that you’ve been enjoying my recent camera upgrades and pictures, and I’ve had a request to do a how I take my blog pictures photo, so here we are – your wish is my desire!
I feel like I should begin with a quick disclaimer, I am by no means a photography expert – this is just the way over the past year of trial and a lot of error that I’ve found has worked for me,
and I’ve finally found what I think is my groove. These are also my opinions on what works for me/my house, and reflects me – if you have a different way you love, or disagree with me – that’s absolutely fine, you do you girl.
Setup
I have a few different areas where I photograph things, my most favourite being the marble base and white background, which I hate myself for saying because it’s so cliché, but the white background makes colours pop, photos easier and quicker to colour balance. If the white looks white in your photos, the rest of the colours are likely to be bang on too. This set up is a bit of a hassle to do as it involves me rearranging my living room/exiling the dogs for an hour/having the perfect light in the morning so I’ll use this set up for about 4+ blog posts worth at a time.


The white backdrop is just the natural colour of my walls, we have a silvery pattern of trees in our living room (which FYI, is not dog friendly!) and preferably nice bright light. The Marble is transfer paper which I ordered about 6 different types of marble paper until I found the right one, some were too patterned, too dark or slightly too blue. You can add this sticky paper to everything but I needed something large, and long and that was preferably going to last really well, luckily we had a piece of countertop from when we had our kitchen island put in at Christmas that I decided I was going to salvage from the builders pile of trash and I’m glad I did as it’s come in handy, although it’s a bitch to store!


I also really like using my 1950s sideboard which I inherited from My Grandad, but the spot it’s in the house means that where I need to stand to take photos means I’m often in the way of the double patio doors where all the light comes beaming through, or it can be way to bright on a sunny day. This isn’t too bad a spot on a late afternoon, but I usually have such a small window of time to take photos here that I don’t use it very often.

In addition to these two spots if I’m just cracking out the odd photo I’m more inclined to just grab a few sheets of paper and do a flat lay instead to save rearranging my living room, I personally never like these pictures as much and I find them way more awkward and ‘less natural’ looking, something about the flatlay method just feels and looks a bit forced to me and I usually regret doing this.

I have a box of papers which are proper craft papers, wallpaper samples (B&Q tends to be better than) and even Paperchase is a great place to get some interesting papers (they do a great faux wood paper that looks like actual wood if you don’t have a nice wood surface in your home, see below!)
Props
In terms of ‘props’ I have a huge selection now since Christmas I have probably gone a bit OTT, my friend Sherry said on Instagram I bet your house is full of makeup and pretty dishes, and she’s not wrong. I even have a cupboard now for some which aren’t used or have a place in my house as they’ve got a bit out of control. But I like to mix things up/need different sizes/colours and it stops every photo looking identical, I like to experiment and try new things.

Great places to shop for dishes and plates are department stores, TK Maxx, H&M Home, Primark and even independent Garden Centres I’ve found to be quite good. In addition to dishes. Places like Anthropologie and Oliver Bonas do some beautiful bits, but the prices can soon rack up for something that you’re just going to put a lipstick on for photos.

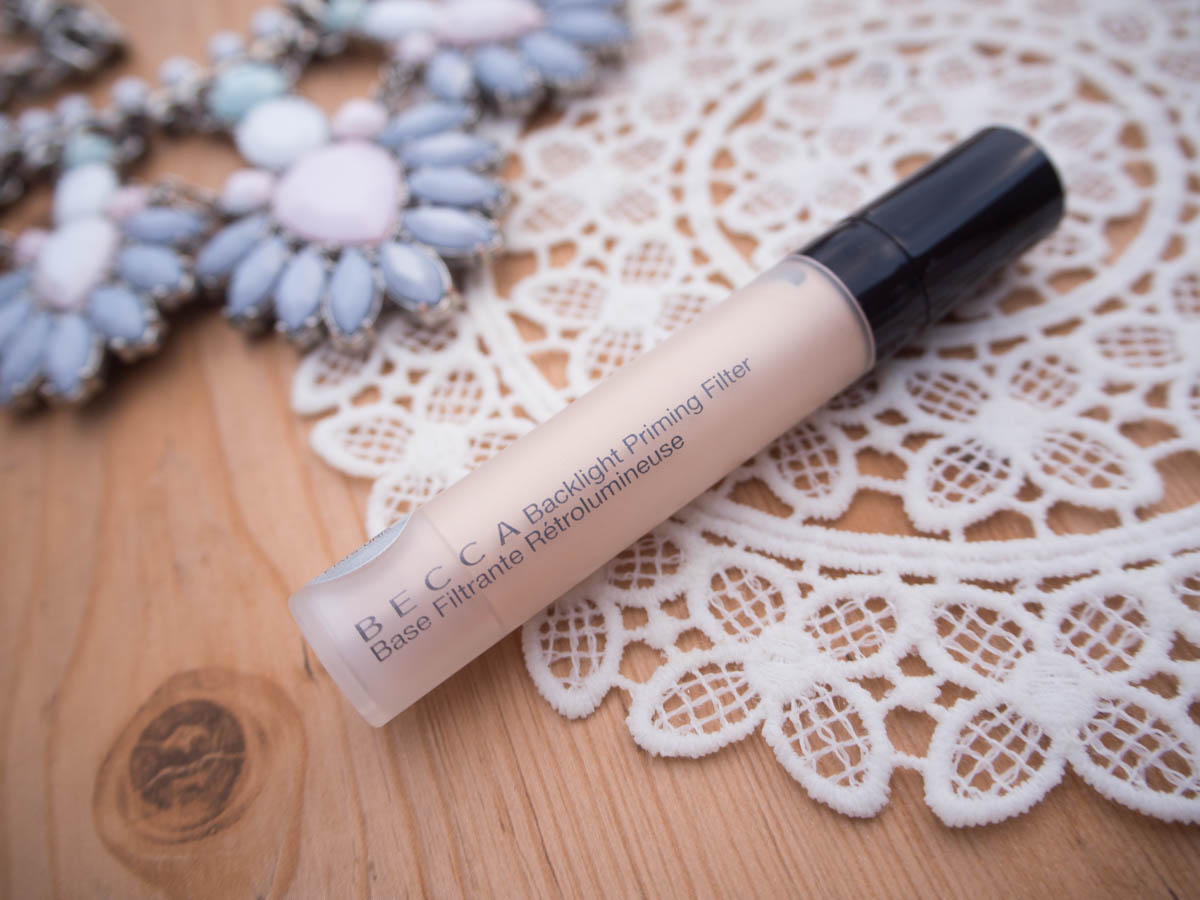
My current favourites are a plant from Tesco which has a cubic design white pot, the Fleur De Force Luxe Life book (thanks to it’s metallic spine), a Primark makeup bag with shiny silvery pastel colours, a gold leaf dish that came from Primark and an opal glass candle which upside down is even better! Honestly, if you’d me three years ago I’d be stood in a garden centre buying a candle because it was pretty on the bottom, I would probably have laughed in your face, but now I see the potential in everything.

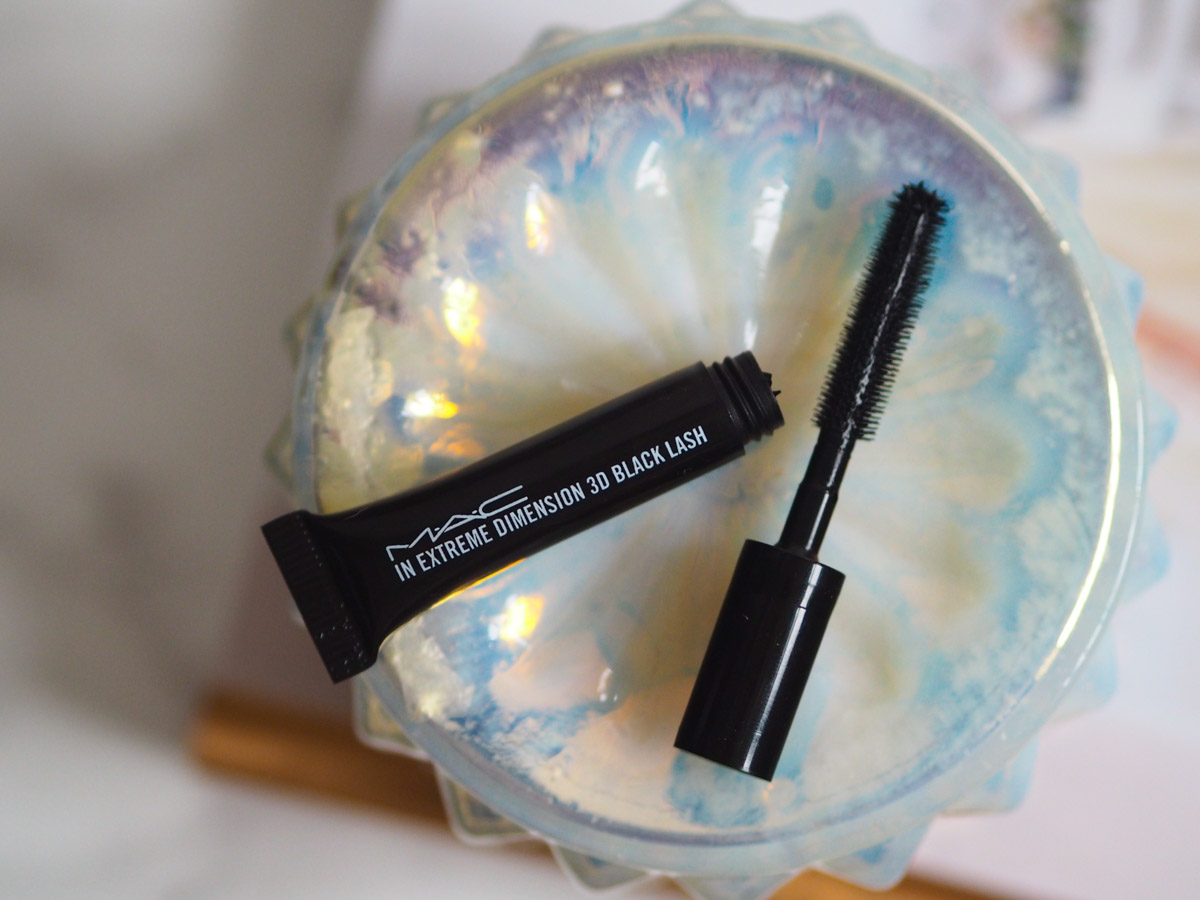
I like things that are metallic because they reflect light, and are great at creating depth. I like picking things that go together and have a mixture of textures, a combination of three of those favourites is working really well at the moment, either swapping out the makeup bag or the gold dish, depending on the product.

In addition to this sometimes I use shiny confetti (which I like but usually end up getting dog hairs mixed in after 4/5 uses and it becomes painful picking them out). I like using Mirrored candle plates and placemats but they can be difficult to work with thanks to reflections and what you have in the background. Blankets can also make interesting softer textures too. When summer comes and my garden is flourishing I grab leaves or petals from plants sometimes for flatlays.


Other people like using fake flowers and plants, personally that’s not me – fake flowers to me generally look fake, I know not everyone has the luxury of a garden to harvest from, and this is just my opinion, you do you – but after all this is a post about how I take pictures! I see the same props (like unnaturally small tiny fake plants in copper pots… New Look I’m looking at you) cropping up on lots of people’s blogs and I try to stay away from what I see other people using, including Lettered Light boxes, which are totally fine if you use them – but I’m just so over the trend from seeing it all over now (we had one for our wedding but I’m now so sick of the sight of them I took it to a charity shop). Nothing wrong with this – just it’s not my style.
Equipment
95% of the pictures in the past year I’ve taken on my Olympus Pen 7, which I bought just before going to New York and replaced my bulkier DSLR camera which has barely seen the light of day since. What I love about the Pen 7 is that it’s easier to carry around and fits in most of my small handbags. Up until February I only had the standard kit lens for this camera, but I got some Amazon vouchers for my birthday which I put towards a 45mm lens and I couldn’t be more in love with the photos it takes.
I actually now really want to invest in a pancake lens if I can prior to honeymoon (will probably be a bit of a squeeze so close now), but I love the effects a set mm lens gives over one which zooms in and out (like my kit lens does).

In addition to the lenses I also now own a filter – there’s lots of filters that do lots of things (as far as I’m aware), but this one is to reduce (or increase if you desire!) shine and reflections, which comes in handy when photographing shiny packets of things – and will be great for travel and taking photos of buildings, where the reflections might be too crazy. This just screws onto the front of the lens and you twist to adjust the positioning, I’ve done lots of testing with this and it was money seriously well spent (considering I think it was under a tenner – definitely under twenty!)
Camera Settings
My Old Panasonic DSLR had way more options and was way more customisable than my PEN ever has been, and initially I was kicking myself for spending just short of £500 on a camera that I couldn’t make heads nor tails of how to use, it’s so idiot proof, I was being an idiot, the settings are so simple, and there’s very little I do. The functions I use the most are Image Brightness (Saturation), Temperature (If something is too warm or cool toned neutralising it like a white balance), Blur (makes background and foreground objects appear more or less blurred), and Brightness (If it’s a bit gloomy).

Editing Photos
Most of the time I now use Adobe Lightroom to edit my photos, it’s something I’ve had on hand my entire professional life and never used until about 6 months ago, and I have no idea why because it makes editing photos such a breeze. A year ago I used photoshop which is just as powerful, but if you have 20 photos to edit for a post and each takes 10 minutes copying any settings across and tweaking, it’s far easier to copy and paste the settings in Lightroom and even batch change the images a lot easier than photoshop, and the program just works a lot faster too. There’s not to much I do in Lightroom, but you can turn pictures taken on the darkest, greyest day into something that looks like it was taken in radiant sunshine. Where possible I try to optimise taking in the perfect bright, but not so bright light – as it minimises what I have to do to the photos afterwards. I tend to just alter Brightness, Saturation and crop any images until they’re perfect, it’s very rare that I do anything more than that. I’m planning on doing a whole post about how I edit in more depth, but I’m still collecting some really extreme examples to show how it easy it can be to change from the darkest gloomiest photos to something bright and sunshine looking.
I’m at the stage now where Photography, is probably my favourite part of owning a blog – it’s the bit I find least tedious now, and it’s almost therapeutic and relaxing for me now I have tools for the job that help me, and I enjoy getting creative and testing out new equipment and ideas. I’m hoping to do a course at some point in the year – I did look at doing an evening adult education course starting last September to get a formal qualification, but they got back to me too late to apply – I may look at that again for the new school year. I now like investing and researching camera equipment and what’s the next things I want to make my photos even better as my love for photography now extends outside of my blog and I love having my camera with me just about all the time to take a bangin’ photo of everything in life. Just to show you, a little over 18 months ago this is what my photos looked like, if I can do it you can.

Do you have any tips for taking photos? Leave them in the comments below!

Facebook | Instagram | Twitter | Pinterest | Tumblr

Email: helplesswhilstdrying@gmail.com


Loved this post, i love your flat lays i think they’re always good!! All your photos are banging xx
Ahh thank you! I still feel like I haven’t mastered it and it looks like I just slapped a load of things together most of the time, you’ve got the flatlay down but for me I never love them! xx
SO much good info! <3
It must have taken you a long time to write this! Thanks for sharing your tips- yous pics are ace! I like to find unique homeware items in TK Maxx as well 🙂
TK Maxx is the best for unique stuff you wouldn’t find anywhere else, that’s why I like shopping there as I never see my props crop up with anyone else!
Loved this post – not just for the cheeky mention either 😜
You’ve gone into so much detail which is so helpful for smaller bloggers – this should be their bible! I would never have known that some of your photos are the base of a candle!
Job well done Rach!
Ahh thank you!
Haha, oh damn I meant to link you – I was doing it on my phone and the link was being such a shit I meant to do it on my imac, I’ll do that on lunch later!
xx
Great post, loved it !
Thank you! x
Blog photography is something I want to improve and work harder on. Some great tips and ideas Rachael x
Thank you! It’s something that I now enjoy which I used to find so tedious!
I find it tedious lately which I think is part of the reason my posts have been more sporadic. I haven’t spent much time taking pictures and getting inspired to take them. Slowly getting there lol x
I dedicate a chunk of time, usually a Sunday morning to getting 3/4 all the way up to 10 posts done at a time, I find it I do them one by one it seems more chore like!
I work weekends otherwise I’d do it then too.
Your photos always look on point. Thank you for this post, it’s super helpful. xx
https://simpleserenity.wordpress.com
Thanks Azra glad to hear it was helpful! Xx
I love seeing behind the scenes of blog photos! Your photos are so nice and clear, loved reading! 💕
https://busybeeblogweb.wordpress.com
Thank you so much I appreciate that! Xx
Love this post! This is so helpful as I seem to be running out of backdrops for my flatlays this has given me loads of ideas! Also helpful as I’ve recently swapped from using my iPhone to a proper camera to take my blog photos so Thankyou!!! X
No problem! Glad it helped! Xx
Your photos always look great. Love your natural wallpaper backdrop x
Thank you danni!
I love this post – I think it’s so interesting to see how you do everything behind the scenes! And I love your images! x
Thank you, what else would you like to see behind the scenes? X
A day in the life of…would probably be quite interesting! Or your thoughts while writing a blog post or something! X
Sorry totally misread this comment! Ready for the weekend 🙈
Hahaha it’s fine I’ve given you suggestions anyway 😂😂😂 x
Haha thank you! xxx
What an informative post! Thanks for sharing. I like hearing about what other people do to get the perfect blog photo.
Thanks for your comment! xx
Marble is so 2016!!! 😛
But I do agree that light / white backgrounds are best. I’ve played around with various colours including black and colours don’t show up true.
I would love for natural light but it’s just not available as I usually only have evenings to photograph.
Props are just not my style at all… plus, I can’t imagine housing props at my place. Nope, can’t do it!
Maybe one day I’ll invest in a more expensive camera but my issue is I’d never ever lug a DSLR camera with the big ass lenses for vacations – I can never justify buying a camera just for blogging.
Great behind the scenes! 🙂
Yeah, that’s why I ended up getting rid of my bigger one (physically it’s still collecting dust and should definitely sell it) that’s double the size and I hated carrying it around on holidays, this one is a little bigger than a small compact camera but still has the power of a full blown DSLR which I love, and I’ll never get any lenses bigger than what I have I don’t think these are nicely sized and just fit into any space I gave in a bag!
The clocks have just changed here and I should be able to start getting some pictures in the evening but I largely have to rely on weekends for getting the lighting i’m happy with! I have looked into getting some proper lighting to create a natural light but they’re so huge I don’t know where I’d put it in our current house, when we move I plan on having a home office / blog room and I’ll probably invest in lighting then.
I think I may curb my prop buying, until I get to Asia then I imagine I’m going to go crazy again with new interesting objects!
Don’t on the marble, haha – You can barely see it in most photos it’s so faint.
I think your photos are fabulous. It’s great that you try and find your own style. I hate blog photography as it takes so long to set up and I don’t always get the results I want. Still, I am trying to experiment more and I’m certain this post will help to give me some tips!
Loved getting a sneak peek and look at how you take your photos, they are always so pretty x
Great tips , Rachael! Wow. So helpful! I just posted my a little something for the brand Marc Jacobs and AAAAH! Im so excited! Have you seen it? Take care! XOXO
I love your tips! And the throwback – it’s great to be able to see how much you’ve improved. I definitely need some kind of marble slab!
I love seeing how bbloggers take their pictures, everyone has their own style!
Fab tips, Rachael! Always wanted to know about your set up. I cannot imagine going anywhere without my dslr 😂 I even hike with my 2kg camera wahaha. It’s the fab feeling of the weight in my hands. I still cannot decided whether I’m ready for mirrorless yet 🤔
The thought of carrying my dslr now makes me sweat just thinking about it, I praise you for doing it – for what I need what I have now is good enough for what I need it for, and I’m more inclined to pick it up and take it places as it fits in all my handbags!
Wahaha I buy handbags to fit my dslr 😂 I can’t live without that ‘click’ recoil lol
Your photos are always gorgeous & you are one of my favourite Instagram pages 😍 I love looking at pretty things so I always gravitate towards your posts! I agree with what you said though, I don’t have the right tools for the job and I find the photography part quite tedious, especially when I can’t get the light or the background right. If I do happen to enjoy my background however I can enjoy it more. Lovely post 💕 x
Aww thank you so much! Yeah I realise it’s not in everyone’s grasps to go out and buy a camera and it’s something I saved up for a year prior to buying! I think the background makes all the difference to how I feel about the picture overall, has way more influence over everything else!
Please can you come and take all my photos or teach me how to stage them 😂 I’m so bad at it!! Xxx
I love reading these as I really need to work on my blog photography and other people’s experiences are so handy! Love this :)! I have always loved your photos too xx
Thank you lovely! Glad you found it helpful!
Some fab tips Rach, I’ve got my marble sample but really want to find some nice papers after reading this! Your photos are ALWAYS gorgeous so great to know how you do them.
Kara
http://www.spreadthesparkle.co.uk
💗
Fab tips! Can you remember where you got your marble paper from? I’ve been looking everywhere with no success! xx
It was amazon but I have no idea which one was the successful one as I ordered several at the same time and they all came without names on!
Ah no worries! Ill have a look on Amazon and see what I can find X
Such a lovely and informative blog post! I have learnt a lot about photography this year too and definitely find it less tedious than I used to! I am slowly upping my photography game on my blog! I found the post really informative!
Thank you SO much for sharing this! I definitely have my eye on a new lense now! and I love how you are creative with your props! I will get the hang of it, its just a slow process! haha. your photos are so beautiful! xxxx
Oh, Rach! You should scroll through my very first pictures! I am so proud of myself!
It’s so nice looking back and seeing progress I think! x
This was such a fun post to read. It’s amazing to see how far your come in your photography skills. Thanks for providing where you were just 18 months ago. I love seeing progression like that.
Thanks Belinda! It’s always handy looking back over old posts if feeling bit demotivated and seeing how far you’ve come I find!
Lovely tips! I especially liked the comparison at the end of the post 😁
Thank you!